
Learning how to snowboard can feel challenging at first, but with the right techniques, equipment, and practice, beginners can quickly build confidence on the slopes. Snowboarding combines balance, coordination, and edge control, making it an exciting winter sport for people of all ages.
In this beginner-friendly guide, you’ll learn how to snowboard step by step, from choosing the right gear and finding your stance to stopping, turning, and controlling your speed. Whether you’re snowboarding for the first time or want to improve your basic skills, these practical tips will help you get started safely.
Is Snowboarding Hard to Learn?
Learning how to snowboard takes practice, but beginners can make steady progress by learning one skill at a time. Every new rider wonders: How long does it take to learn to snowboard? The honest answer: it depends on you. Factors include your fitness, experience with skateboards or skis, and how often you practice.
Generally, your first goal isn’t carving fast lines it’s comfort. That means staying upright when your board picks up speed and learning to stop when needed. You can teach yourself some things, but even a short lesson speeds up progress. In any case, don’t get discouraged. Everyone falls.
If you focus on small wins—skating down flat sections, gliding on a gentle pitch, doing a slow J-turn—each session builds your confidence. Within a few runs, many beginners report they can link a couple turns, stay on the board, and avoid feeling terrified. Even if it takes a few days, that’s normal.
Get the Right Snowboard Gear Before Your First Run
| Product | Best for | Purchase |
| Oakley MOD1 Snow Helmet | Beginner helmet | Check Price on Amazon → |
| Smith Squad XL Goggles | Beginner goggles | Check Price on Amazon → |
| Snowboard Boots | Comfort & board control | See Options on Amazon → |
| Waterproof Snowboard Jacket | Warmth & weather protection | Check Price on Amazon → |
| Waterproof Snowboard Pants | Staying dry during falls | See Options on Amazon → |
| Waterproof Snowboard Gloves | Warm, protected hands | Check Price on Amazon → |
| Snowboard Wrist Guards | Beginner fall protection | See Options on Amazon → |
You need a snowboard that suits your height and skill level, along with well-fitting boots and properly adjusted bindings. Essential safety gear includes a certified helmet and anti-fog goggles, while waterproof jackets, pants, gloves, and warm merino socks help keep you comfortable. Wrist guards and padded shorts can also provide extra protection from falls.
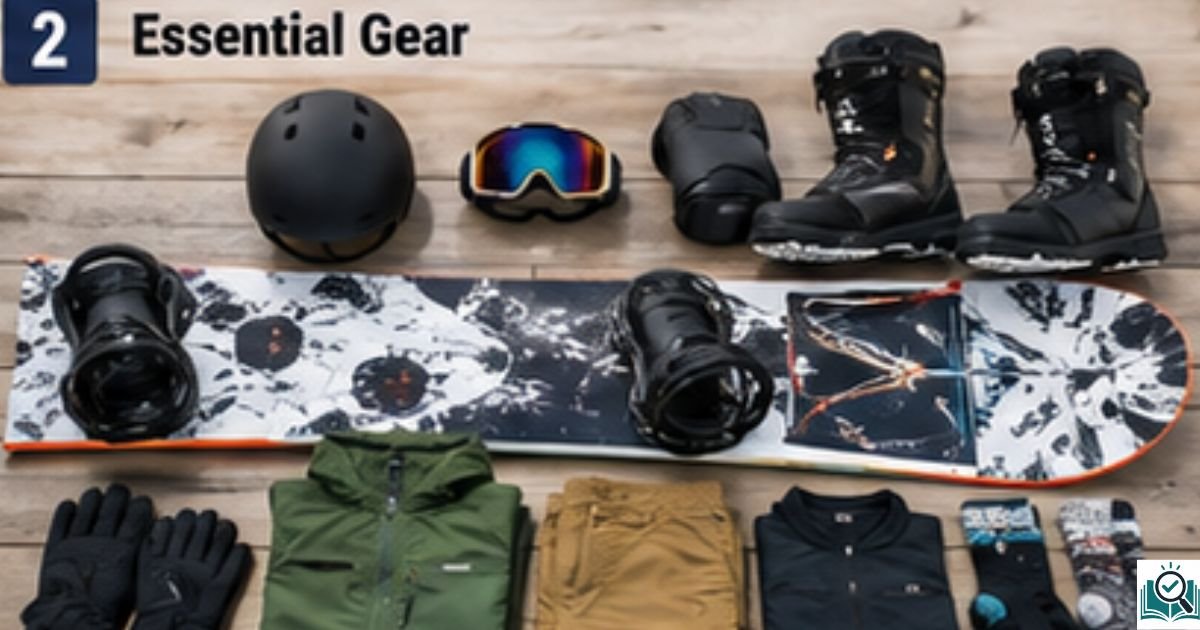
Having the right equipment makes learning how to snowboard safer and more comfortable.
What Should a Beginner Wear Snowboarding?
Wear clothes in layers. A warm base layer and a fleece under waterproof jacket and pants keep you dry. Always wear gloves and good socks. A properly fitted helmet and clear or tinted goggles protect your head and eyes. Avoid cotton, which holds wetness and cold. Comfort is key. Proper clothing is an important part of knowing how to snowboard safely in changing mountain conditions
Find Your Snowboard Stance: Regular vs. Goofy
Before learning how to snowboard on a slope, you need to find a stance that feels natural and balanced.Your snowboard stance is which foot you put forward. A regular stance means your left front foot is forward; a goofy stance means your right front foot leads. Neither is better. Try sliding on slick ground; whichever foot steps first is likely your lead foot. Use whichever feels natural to you.
Regular vs. goofy really just means which side of the board you balance on. Once determined, set your bindings accordingly, most beginners start with a neutral angle on both bindings (0°) or a slightly turned for comfort.
Snowboard stance width also matters: shoulders distance apart is a good starting point. When standing, your hips, shoulders, and knees should all align with the board’s length. Think of it like athletic skateboarding position, just sideways on snow.
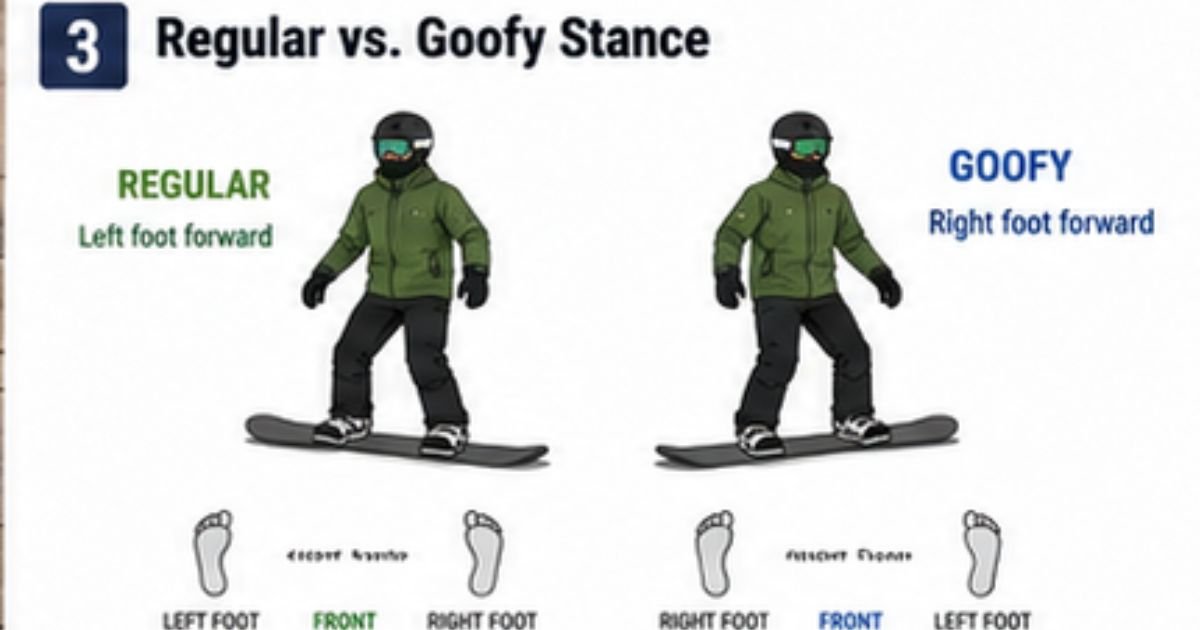
How to Determine Your Snowboard Stance
To recap in advice form: try both stances if unsure. Strap in a couple of tentative bindings on flat ground and lean one way, then the other. Does one feel like you’ll tip if you lean further? That might be your non-dominant side. Use what feels like “walking on stairs” instinct.
Once you’ve picked your stance, set your binding angles. Common beginner angles are +15° front, +0° to -6° back (front turned slightly, back neutral or a bit turned back). These allow easy initiation of heelside and toeside turns without too much torque. Once your stance feels comfortable, you’re ready to continue learning how to snowboard on gentle terrain.
Learn the Basic Snowboard Stance and How to Fall
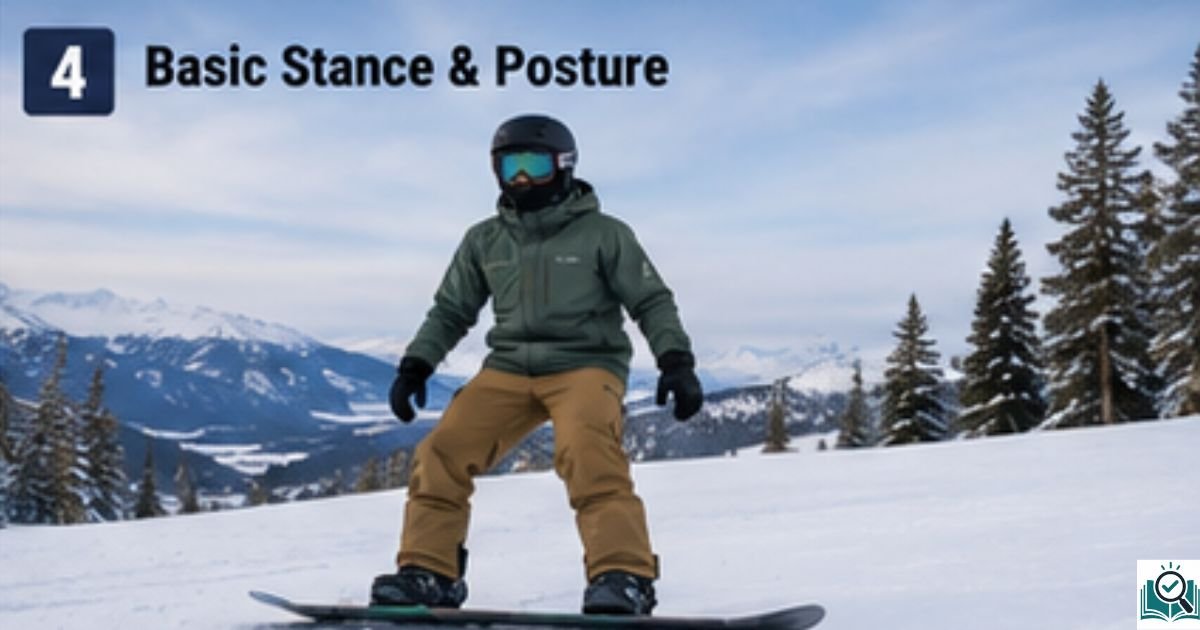
One of the first things you should learn when practicing how to snowboard is how to maintain a balanced stance. Your fundamental posture on a board is called the athletic stance. It’s not crouching down like a linebacker, but a soft-bend at the knees and ankles. Keep your shoulders level and your hips centered over the board. Eyes should look downhill in the direction you intend to go, not at your board.
Imagine you’re ready to jump: knees absorb bumps, and your upper body stays calm and square to the board. If you tense up or lean too far back, you’ll catch edges. So, bend your arms slightly and keep them near your hips for balance, not flailing in the air.
Now, when you do lose balance, the goal is a soft, safe fall. For a forward fall, tuck and roll onto your forearms. For a backward fall, lean back and sit out, keeping your hands in your lap. Avoid locking your legs straight; if you feel you’ll crash, slowly land as if taking a seat in the snow, then relax.
How to Stand Up on a Snowboard
Being able to stand up confidently is another essential skill when learning how to snowboard. After a stop or fall on a slope, you’re usually sitting or on one knee. To stand, first position the board across the slope. This way, you won’t immediately slide. Place one hand on the uphill side of the board to anchor it. Squat as if pushing yourself up, shifting weight to your uphill hand.
Use the traction pad (between your bindings) if needed for grip. When rising, keep knees bent. Springing upright too quickly can cause a slip. Once on one knee, slide your rear foot under your leg and shuffle it into the binding. Then stand straight onto both feet. This gets easier after practice on gentle inclines or flat sections.
How to Skate and Glide on a Snowboard
Skating
Learning how to snowboard also means knowing how to move around when only one foot is strapped into the board. Stay seated on a gentle slope. Strap only your front foot into the binding, leaving the back foot free. Place that free foot (or shoe) on the snow at the board’s tail behind the binding. Push off like a skateboarder: keep your board pointed downhill and gently push with the free foot.
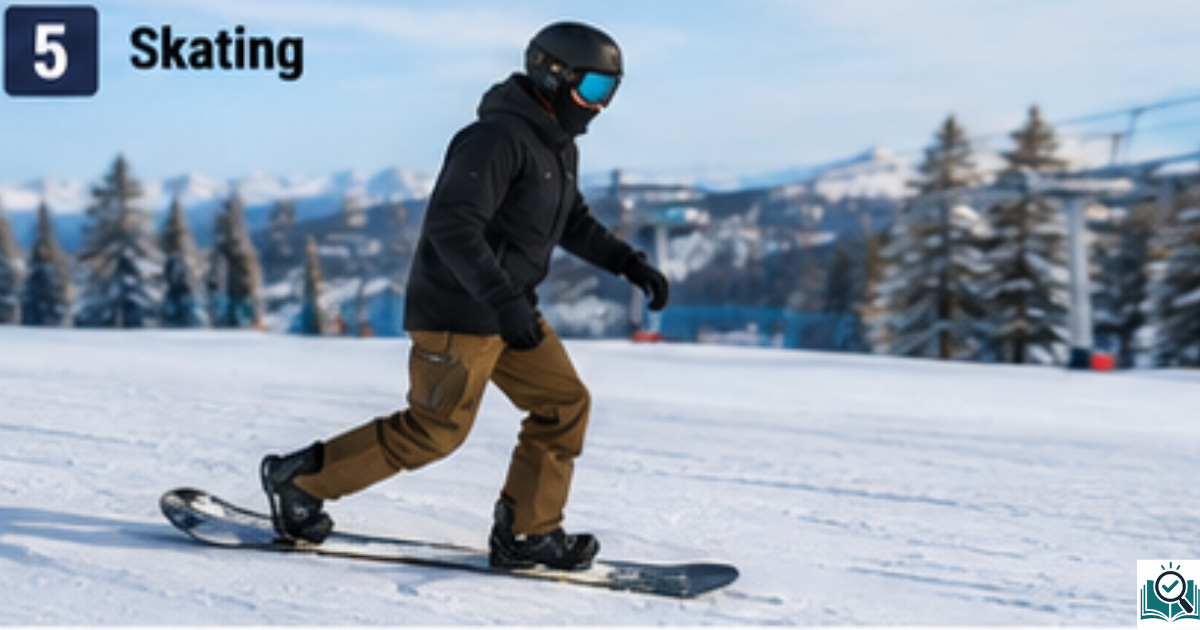
Short, controlled steps work best. This lets you move across parking lots or flat areas. Don’t spread your legs too wide, keep your feet about hip-width apart. As you skate, look ahead to steer, and don’t let the free foot drift too far in front. With practice, you’ll even learn to pump gently uphill on flat sections by hopping the board.
Gliding
Once skating feels comfortable on flat ground, move to gliding. On a very slight slope, strap in your front foot and place the other on the board’s tail, pressing it against the rear binding (no snow contact). Now both feet are on the board, one strapped in.
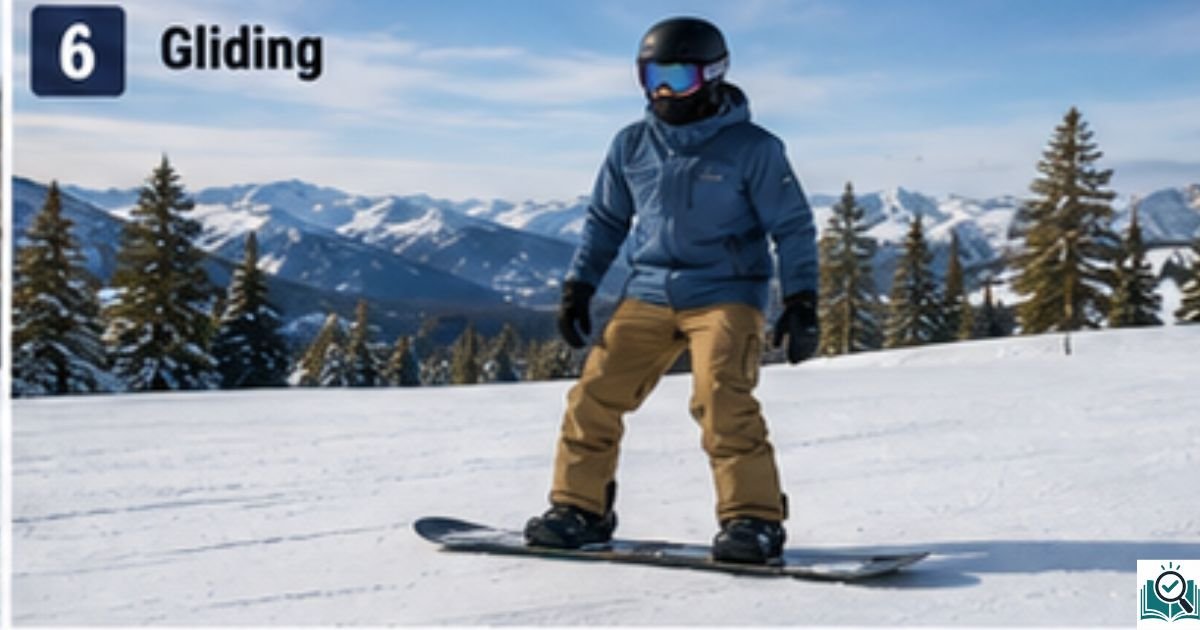
Lean forward just a bit, keep knees bent and shoulders aligned. Start on a gentle grade with plenty of runout. Let the board slide smoothly. The free foot can lightly press against the back of the board for stability. The key is maintaining balance: eyes forward, hips above the center of the board. Once you can glide comfortably, you’re ready for the next steps in learning how to snowboard.
How to Stop on a Snowboard
If you want to learn how to snowboard safely, stopping should be one of your first priorities. Being able to stop is actually more important than going fast. The basic technique is to use the board’s edge to brake.
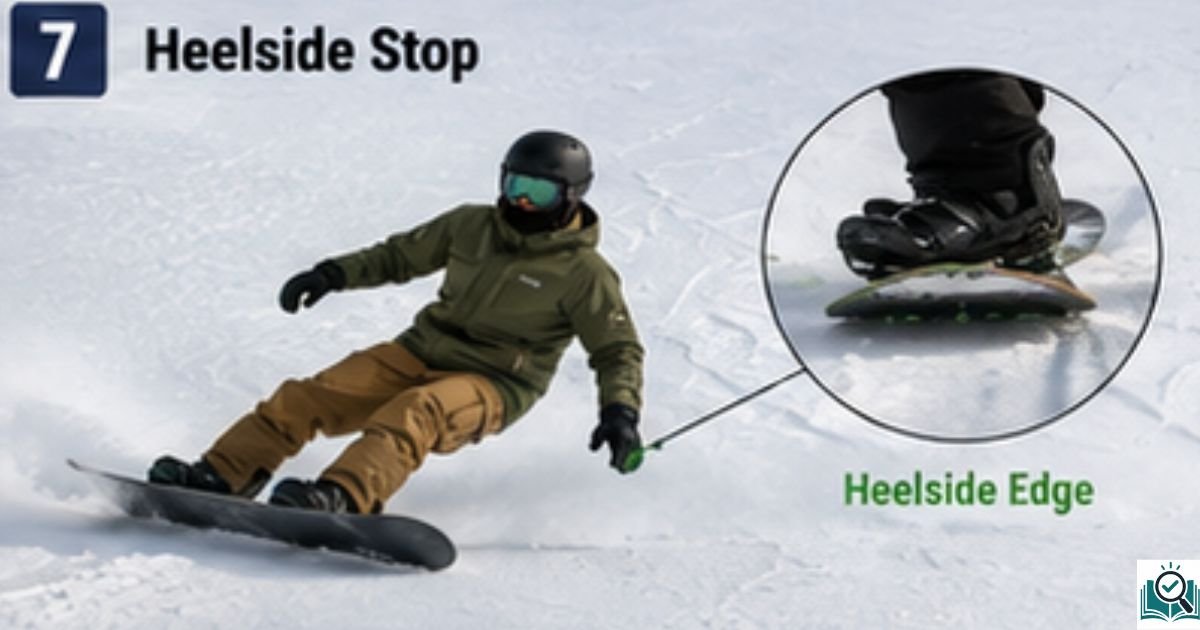
For the heelside stop
Lean back slightly to engage the board’s uphill edge under your heels. Bend your knees and keep your weight on both feet (or slightly more on your back foot). Gently lift the board’s nose by flexing at the ankles, so the heelside edge digs into the snow.
The board will gradually slow. If you need to stop faster, increase the edge angle (lean a bit more, sink deeper into your heels). The idea is to drag the board sideways uphill to bleed off speed.
For the toeside stop
Lean forward slightly, shifting weight onto your toes. Push your shins against the boots and gently drop the board’s heel edge. Keep knees bent and try not to stand on tiptoes. The front edge (toeside) will bite into the snow and slow you. It may feel odd at first because you’re sliding the board with the front edge instead of the back.
Practice both stopping techniques until you feel confident controlling your speed while learning how to snowboard. Whenever you feel you’re going too fast, remember the simplest trick: gradually cross your board sideways across the slope, edge down, and you’ll slow or stop.
How to Turn on a Snowboard
Turning is how you control your path down the hill. Learning how to snowboard becomes much easier once you understand how to use turns to control your speed. Turns are not just for changing direction; they control speed too.
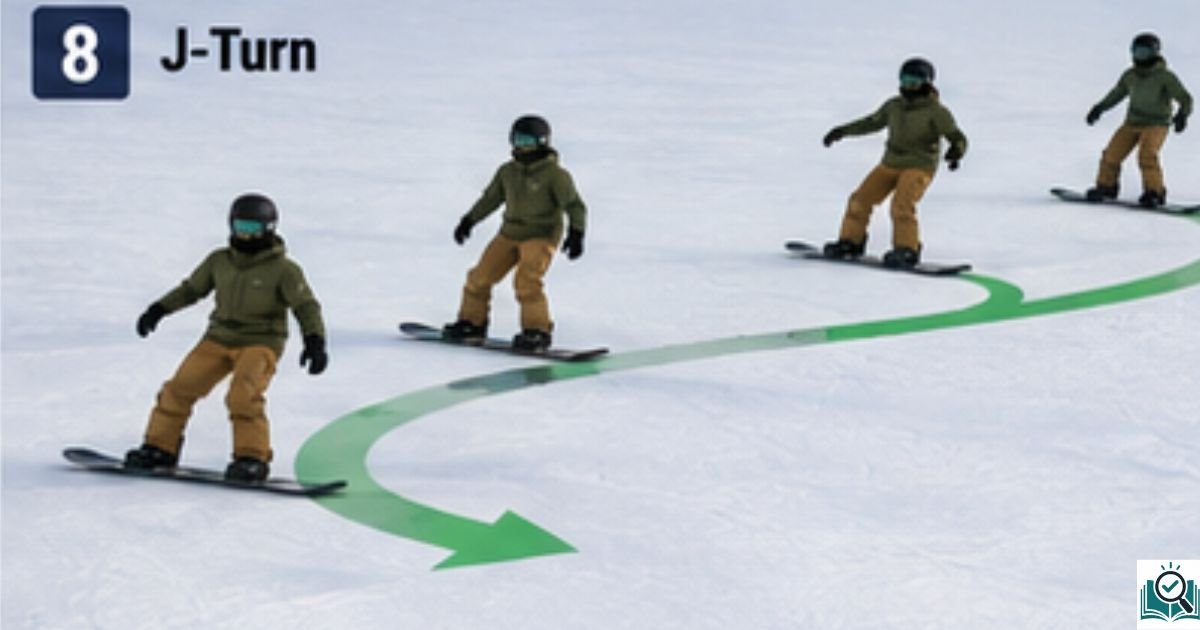
How to Make Your First J-Turn
Start on a gentle slope with your board pointed downhill. Let the board glide for a moment. Then gently shift weight forward to engage a new edge. For a toeside J-turn, shift onto your toes and turn uphill a bit. For a heelside J-turn, lean back onto your heels and carve uphill. The board will swing in a “J” shape. Keep it gentle and controlled.
How to Make a Heelside Turn
Begin with the board across the slope on your heel edge. Look in the direction you want to go (downhill). Squat low and slowly roll your board uphill by shifting weight onto your heels. The board will arc uphill and slow. Once the board points across again, flatten it to stop or switch edges for the next turn.
How to Make a Toeside Turn
Begin with the board across the slope on your toe edge. Look downhill. Slowly shift your weight over your toes and press the front of the board down. This will carve you uphill on the toe side. Keep your knees bent. The board will arc across the slope, slowing you. Flatten the board when you reach the direction you want.
How to Link Turns
Linking turns means going from a heel-edge turn directly into a toe-edge turn and back, forming an S-shaped path. It’s how you really descend the slope. After finishing one turn (say on heels), let the board flatten out. Now transfer smoothly: shift your weight from heels onto your toes, guiding the board gradually around into the next turn. Don’t try to pivot sharply; imagine tracing a gradual “S”.
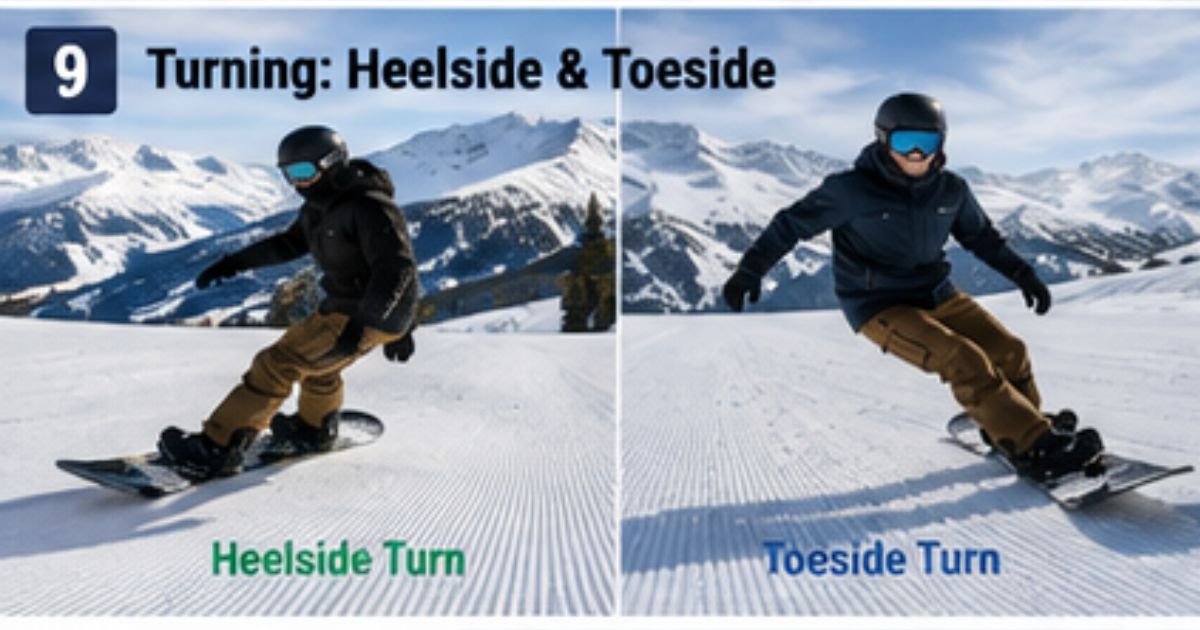
As you learn how to snowboard, linking heel-edge and toe-edge turns will help you move smoothly down the slope. A good rhythm to start: after completing a heel-side turn across the slope, allow the board to flatten (you’ll slow slightly), then slowly put weight onto the opposite foot to steer into the next turn.
Learn Snowboard Edge Control and the Falling Leaf
Snowboard edge control is the skill of holding an edge to manage speed and direction, especially useful before turns or to practice sliding sideways. A great drill for beginners is the falling leaf.
In the falling-leaf drill, you travel down a gentle slope but do not fully turn downhill. Instead, keep the board on one edge (heelside or toeside) as you move across the hill, then shift back to the center to stop.
On a small hill, lean on one edge. Start on your heelside edge: press your heels slightly while gliding across. Shift more weight uphill to stop. Then switch to the toeside edge and do the same. This back-and-forth “falling leaf” motion builds control and confidence.
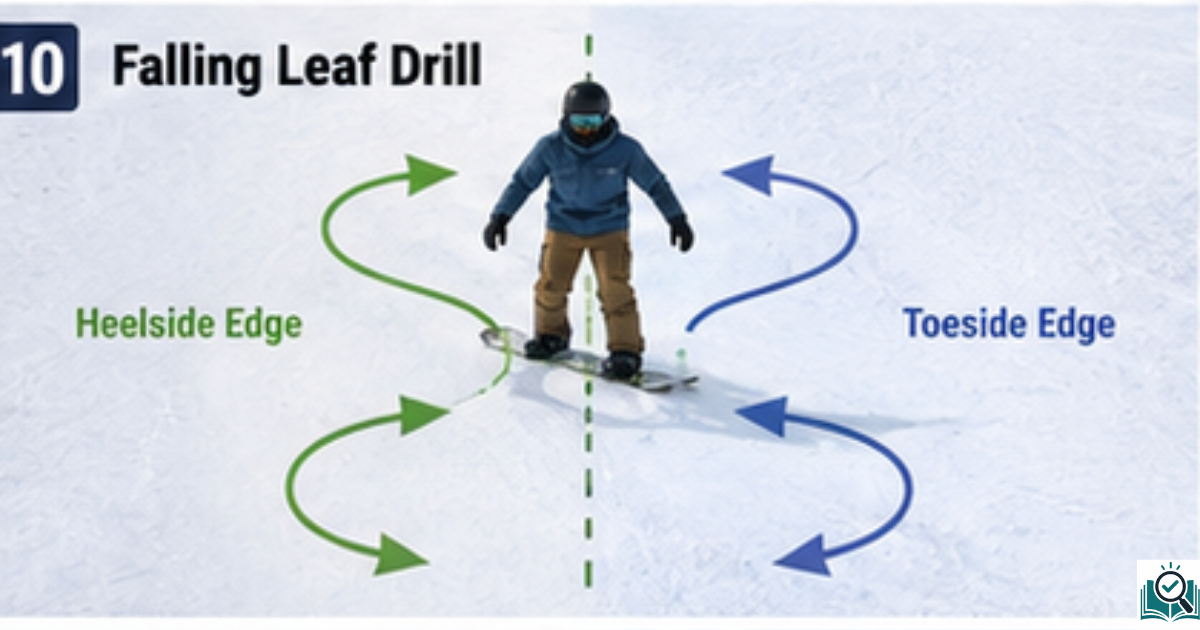
How to Practice the Falling Leaf Snowboard Drill
– Choose a gentle, wide green hill. Ride across it heelside: lean on your heels, board edge down. You should move slightly down and across.
– Flatten out (neutral edge) momentarily, then lean right back onto heels to slide back in the opposite direction (still diagonal).
– Repeat this left-right cross-slope movement. Don’t complete a turn; always turn uphill a bit then straighten out.
– When comfortable, try it on your toeside edge: ride diagonally with the board on the toe edge, flatten, then slide diagonally the other way.
– The path should look like overlapping leaves drifting down: left-right-left on one edge, then repeat on the other edge.
– If you pick up too much speed, dig in a bit more edge or flatten sooner. If you stall, just lean more. The goal is continuous controlled sliding.
How to Get On and Off a Snowboard Chairlift
Knowing how to use a chairlift is an important part of learning how to snowboard at a ski resort. Riding a chairlift on a snowboard is a milestone that often terrifies first-timers. Follow these steps calmly and you’ll manage fine.
How to Get on a Snowboard Chairlift
Approach the loading area with your board. Keep your front foot strapped in and your back foot free. Skate straight to the loading spot and sit back fully when the chair arrives. Hold the padded bar down. If needed, raise your hand for help. This smooth loading keeps you safe.
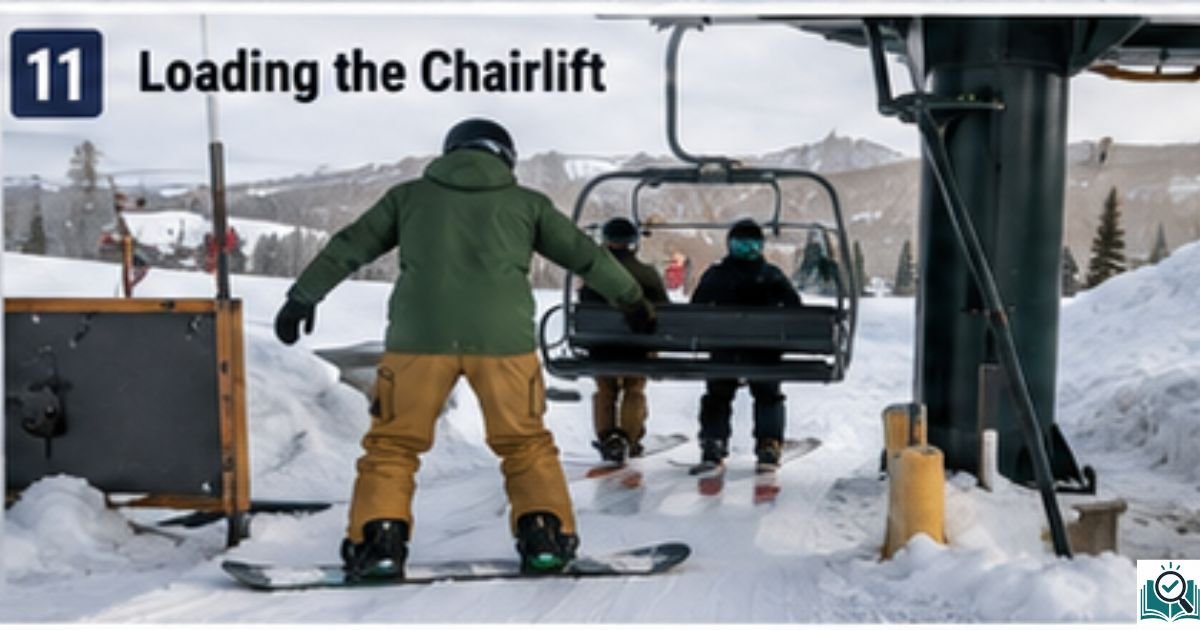
How to Get Off a Snowboard Chairlift
When unloading, keep the board pointed downhill and stand up as the chair glides under. Glide straight off the platform. Once clear, move quickly out of the way. If you fall, sit down quickly out of the way so others can unload safely. Follow posted instructions and never panic.
If you lose your balance on exit, bail safely to the side of the clearing: squat and let the board slide away from the unloading zone. Never stay put on the runner. It’s okay to practice: many beginner areas allow you to slide off multiple times. The key is to trust that gentle movement. It isn’t much different from the gliding technique you already practiced; the main difference is standing up as the ground approaches
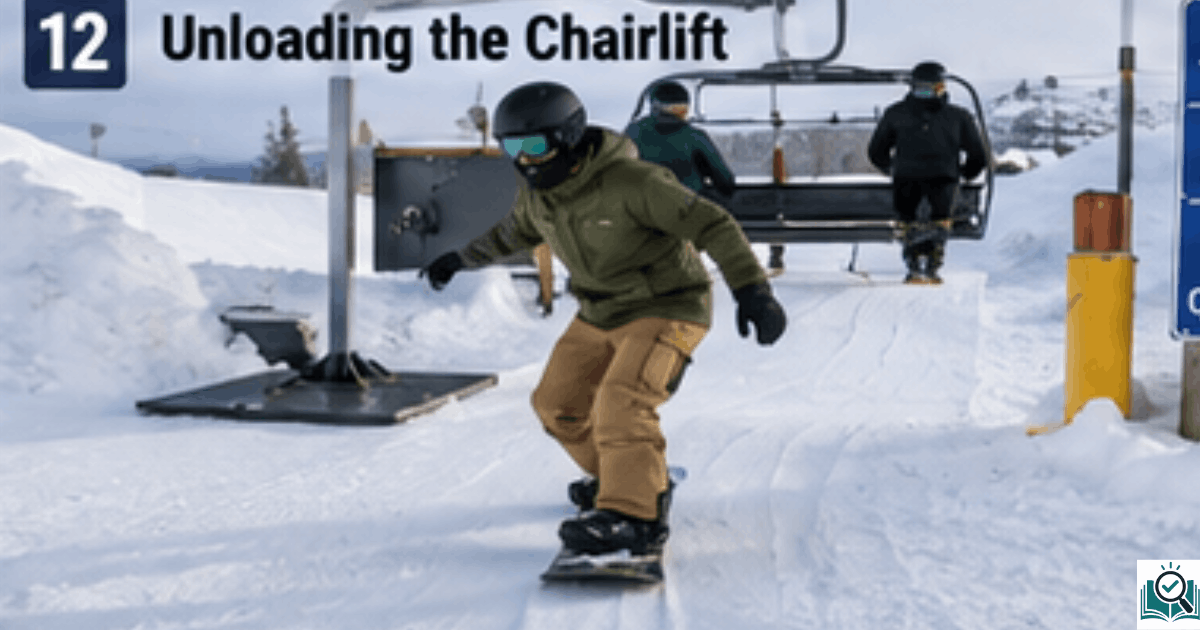
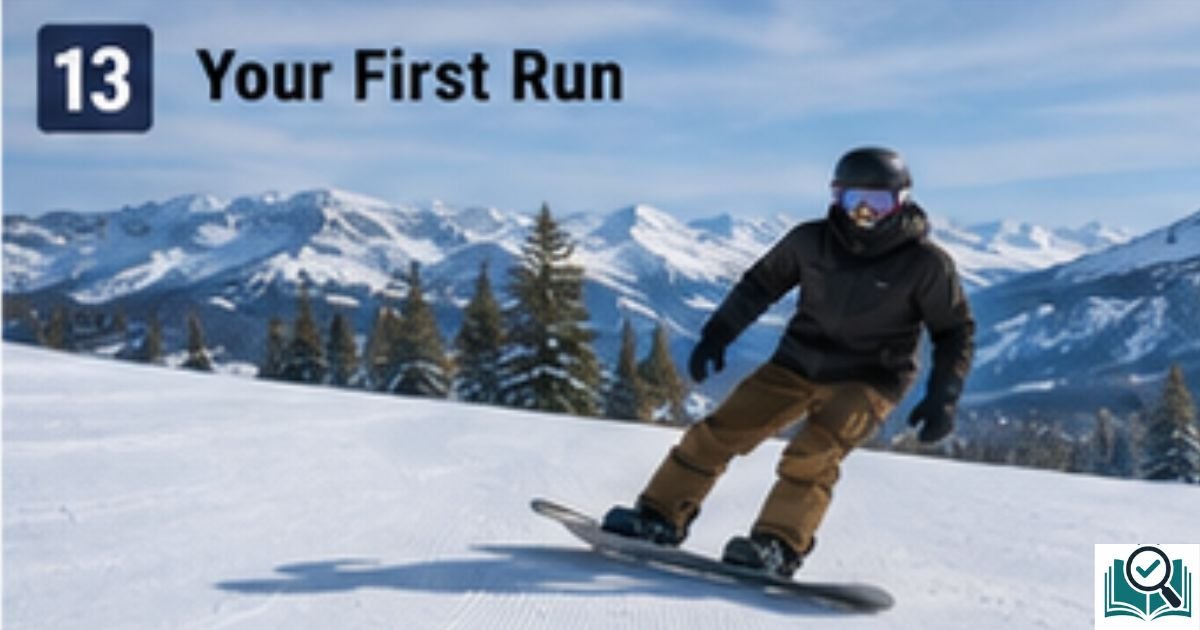
How to Snowboard Down Your First Beginner Run
Now let’s put it all together. Pick a very gentle green run (bunny slope or easy cruiser). After exiting the chair, start by gliding across the slope on your heelside edge until you slow to a stop (a falling leaf). Then practice a big gentle heel-side turn to head back up a little. Next, try a gentle toeside slide. Once you can comfortably switch edges to stop, you’re ready to go straight down a bit.
Go slow. Point your board diagonally across the hill, then make a short S-turn: carve up hill slightly, then traverse back down. Use the techniques above: start each turn with the front foot, flex knees, and shift edges gradually. Control your speed by how much the board points downhill.
How to Control Your Speed While Snowboarding
Keep your speed in check by making plenty of small turns instead of pointing straight down. Traversing (sliding sideways) when you get too fast also helps. An easy trick: if you see a section getting too fast, cross the slope (point board heel down) to scrub speed.
Also, use gentle edges rather than plowing straight. If your board starts feeling faster, just press down on an edge to slow. Never put all your weight on the back foot alone—that actually increases speed. Instead, keep weight evenly distributed as you turn. Good speed control is one of the most important skills you’ll develop as you learn how to snowboard.
Snowboarding Safety Rules Every Beginner Should Know
Snowboarding is an adventurous sport but comes with rules for a reason. In the U.S., ski areas follow the Your Responsibility Code, which applies to snowboarders too. Some key points:
- Always stay in control. You must be able to stop or avoid others. If you start to pick up too much speed, shift weight or turn uphill to slow yourself.
- People downhill have the right-of-way. That means if you’re coming downhill and you see someone below you, you must yield. Beginners especially should look uphill before merging onto any run.
- Stop only where you are visible. Don’t stand or sit in blind corners or narrow spots. Always stop to the side of the trail, not in the middle.
- Watch for trail signs. Closed runs are closed for a reason—deep snow, rocks, or hazards. Be especially cautious around marked hazards or terrain park features (if you’re not practicing jumps yet, avoid parks altogether).
- Load and unload lifts safely. Make sure you know how to do it correctly. NSAA explicitly says you must know how to load and unload safely, and to ask if you need help.
- Never snowboard while impaired. Don’t drink or use drugs before snowboarding. Alcohol can reduce coordination and slow your reaction time, both dangerous on slopes.
Also, be aware of others. Don’t surprise a skier or snowboarder from behind without warning. If you fall, get yourself and your board off the trail quickly. And don’t leave a loose board where it can slide downhill into someone; always secure it.
Most importantly, if at any point you feel tired or unsure, stop and take a break. Snowboarding while exhausted often leads to bad falls. Gear like helmets and wrist guards help protect you, but nothing replaces smart riding.
What Should You Never Do While Snowboarding?
- Never ride beyond your ability. If a trail is too steep or icy, walk it or choose an easier path.
- Never stop on a trail where people can’t see you. Especially avoid stopping around a blind corner or in a narrow chute.
- Never assume others know your plans. Always scan uphill before starting down (someone could be behind you).
- Never use lifts unsafely. Respect instructions (no rocking chairs, etc.).
- Never go alone in unfamiliar terrain. Especially out-of-bounds areas or forests. If you’re solo, stick to patrol routes or bring a buddy.
- Never ignore pain or frostbite. Warm up, hydrate, and if any gear like boots or bindings pinches, fix it.
Following these rules and the basic advice above keeps you safer. In fact, the single best safety tip is: stay in control at all times. If you do that, you’ll drastically reduce your risk of collisions or runaway slides.
Common Snowboarding Mistakes Beginners Should Avoid
It’s easy to pick up bad habits early. Here are some pitfalls to watch out for:
- Leaning Back Too Much: Many newbies instinctively lean on their back foot to feel stable. This actually makes you less balanced. Keep weight centered or slightly forward on the front foot when initiating moves.
- Straight Legs: If you stand up too straight, the board gets snappy and unpredictable. Always keep knees bent; this gives you shock absorption and quick edge control.
- Looking Down at the Board: Staring at your feet or board while moving is a big mistake. Always look ahead where you want to go; your board follows your eyes.
- Catching an Edge: Overusing one edge (usually heelside only) or turning too abruptly often catches an edge, causing falls. Learn both heel and toe sides evenly and transition gradually.
- Trying to Go Too Fast: Don’t mimic advanced riders. Big speed early means big spills. Focus on technique, not how fast you descend.
- Ignoring Warm-Up: Start slow. Stretch or do a short slope to warm legs. Cold, stiff muscles lead to injuries.
- Bad Falling Habits: If you panic mid-fall, you might try to jump out of your bindings. That can twist an ankle. Instead, relax and let the board slide.
- Poor Gear Fit: Boots that are too tight or loose, gloves that let snow in, or a helmet not snug, all distract from focus. Ensure everything fits well (or get professional help).
Avoiding these common mistakes can make learning how to snowboard much easier and less frustrating.
Why Do Beginner Snowboarders Keep Falling?
Falling is common for these reasons:
- Weight is off-center. If you lean too far back or forward, the board’s edge grabs unexpectedly.
- Locked joints. Stiff ankles or knees cause loss of shock absorption.
- Low visibility. Stopping in shadows or blind spots can surprise new riders.
- Unexpected terrain. Ice patches, bumps, or frozen snow can catch people off guard.
- Too much speed. Without slow, easy turns first, a faster slope quickly becomes uncontrollable.
If you fall, don’t panic. Modern boards have release-on-fall bindings (if you fall hard, your bindings may pop off – that’s fine, put your feet back in and keep trying). Always tuck your limbs and roll, not brace with arms. Every fall teaches you how your body moves on the board, so think of them as feedback.
How Long Does It Take to Learn How to Snowboard?
This question has many answers. “How many days until I can snowboard comfortably?” is tricky, because people progress at different rates. Let’s break it down into milestones:
- Day 1: Expect to spend 30–50% of time sitting. By the end of the day, many beginners can skate on flat ground and glide short distances. You’ll learn how to fall safely. Perhaps you will have done a few J-turns, but many people don’t feel steady linking turns until Day 2 or 3.
- Day 2-3: With consistent practice, you might conquer basic heelside and toeside turns and be able to traverse slopes. Chairlift loading/unloading should feel normal by now. You’ll probably start building muscle memory for transitions and stops.
- Day 4-7: By now, if you ride a few times each week, you often begin linking turns up and down the whole slope. Your speed control improves, and you may explore slightly steeper green or even easy blue runs. Beginner struggles (like catching an edge every run) decrease significantly.
How quickly you learn how to snowboard depends on your practice, instruction, fitness, and comfort on the board.
How Many Days Does It Take to Snowboard Comfortably?
- First session: Focus on standing, skating, falling leaf. You’ll likely stop often (by design). Success is skating to the chairlift and making one heel-side turn that doesn’t end in a crash.
- After several sessions: You should consistently stand, stop, and do controlled traverses. You’ll feel a bit of that floating sensation. At this point, riding becomes more fun than frustrating.
- Continued practice: A few weeks of riding (not necessarily days in a row) will usually take you from green runs to confident handling of easy blues.
Everyone’s timeline is unique. The trick is to celebrate learning any new skill each day, even a small one. With proper instruction and practice, many beginners say “I’m glad I kept going!” after just a few days.
Frequently Asked Questions About How to Snowboard
How to Snowboard for Beginners?
Start by learning the basic stance, balance, stopping, and turning on a gentle slope. Practice these fundamentals before moving to steeper terrain.
How to Snowboard Basics?
Snowboarding basics include finding your stance, controlling your speed, stopping, turning, and safely getting on and off a lift.
How to Snowboard Better?
To snowboard better, practice your balance, edge control, turns, and stopping regularly. Gradually ride more challenging terrain as your confidence improves.
Can I teach myself how to snowboard?
Yes, you can teach yourself how to snowboard with practice, but taking a beginner lesson can help you learn proper technique and avoid common mistakes.
How to snowboard for the first time?
For your first time snowboarding, wear properly fitted gear, learn your stance, practice balancing and stopping, and start on a beginner-friendly slope.
What is a female snowboarder called?
A female snowboarder is simply called a snowboarder. There is no separate official term specifically for women who snowboard.
Is snowboarding easy to learn?
Snowboarding can be challenging at first, but most beginners can learn the basic skills with proper instruction, consistent practice, and patience.
How to snowboard step by step?
Learn snowboarding step by step by starting with your stance and balance, then practice skating, stopping, falling safely, turning, and controlling your speed.
How to snowboard on ice?
When snowboarding on ice, use controlled movements, keep your knees bent, and maintain steady edge pressure. Avoid sudden turns and excessive speed on icy slopes.
How to snowboard for kids?
Kids can learn snowboarding safely by using properly fitted equipment, wearing protective gear, and starting with basic balance, stopping, and turning on gentle beginner slopes.
Final Tips for Your First Snowboarding Day
Learning how to snowboard takes patience, practice, and a willingness to fall and try again. Start on gentle terrain, focus on your stance, and practice essential skills such as skating, gliding, stopping, and turning before moving to steeper runs. Wear the right protective gear, stay hydrated, take regular breaks, and always ride within your ability.
Don’t worry if you don’t master everything on your first day. Every run helps you build balance, confidence, and control. Stay relaxed, follow the safety rules, and enjoy the process. With consistent practice and proper instruction, you’ll gradually become a more confident snowboarder. Feel free to contact us, if you have any other questions.

Zoha is a dedicated content writer who enjoys researching useful topics and turning detailed information into clear, practical and easy-to-understand articles. With a focus on helpful and reader-friendly content, Zoha creates well researched guides designed to answer everyday questions and help readers make decisions.
kgfuidqurmsomxijzriywqimuuzsqn